
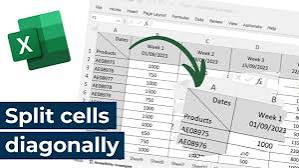
How to Split a Cell Diagonally in Excel?
Splitting a cell diagonally in Excel can be useful when you want to display two different headings inside a single cell. This technique is commonly used in tables, schedules, comparison charts, attendance sheets, and reports where one corner represents a row heading and the other represents a column heading.
However, Excel does not actually allow you to divide one cell into two independent triangular cells. Instead, you can create the appearance of a diagonal split by adding a diagonal border and positioning two pieces of text on opposite sides of the line.
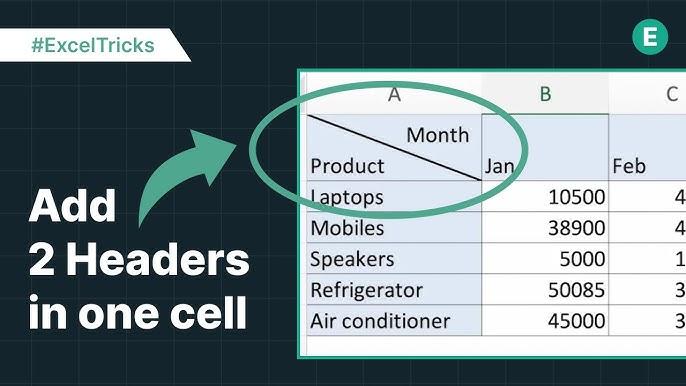
Can You Actually Split a Cell Diagonally in Excel?
Technically, no.
Excel does not have a command that converts one rectangular cell into two separate triangular cells. A cell always remains a single cell containing one value or formula.
What Excel does allow you to do is:
- Add a diagonal line across a cell.
- Display multiple lines of text inside the cell.
- Adjust alignment and spacing to make the text appear on opposite sides.
- Use text boxes when you need more precise positioning.
The result looks like a diagonally divided cell even though Excel still treats it as one cell.
Method 1: Add a Diagonal Border to a Cell
The quickest way to create a diagonal cell is by using Excel’s border formatting tools.
Step 1: Select the Cell
Click the cell you want to divide.
For example, you may want the upper-left cell of a table to show:
Month in one section and Product in the other.
Step 2: Open Format Cells
Right-click the selected cell and choose:
Format Cells
Alternatively, on Windows you can press:
Ctrl + 1
On Mac, the exact shortcut may depend on your Excel version, but you can also access the formatting options through the ribbon.
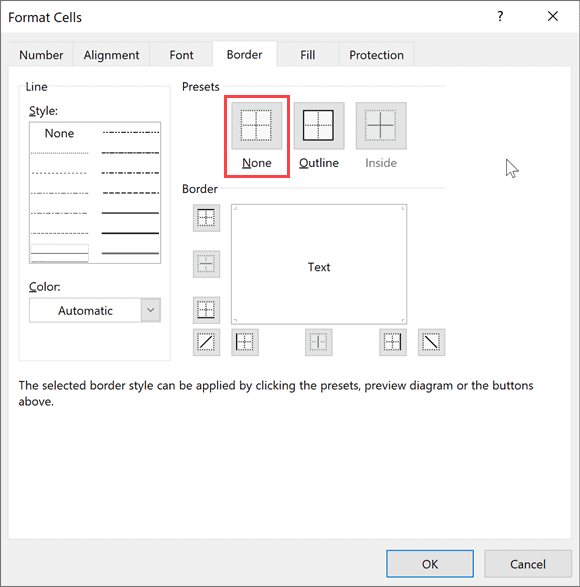
Step 3: Open the Border Tab
Inside the Format Cells window, select:
Border
You will see several border options, including diagonal lines.
Step 4: Choose the Diagonal Direction
Excel normally provides two diagonal border options:
- Diagonal line from the bottom-left to the top-right.
- Diagonal line from the top-left to the bottom-right.
Click the diagonal border you want.
You can also select the line style and thickness before applying the border.
Step 5: Click OK
Click OK to apply the border.
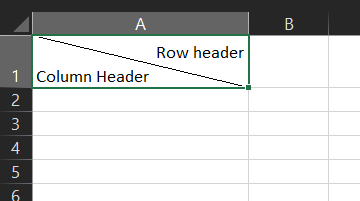
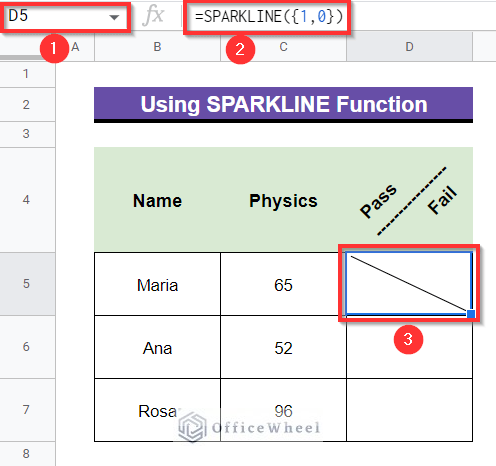
Your cell will now appear to be divided diagonally.
Method 2: Add Two Headings Inside the Diagonal Cell
Adding the line is easy. The more difficult part is positioning two pieces of text so that they look like they belong to separate halves of the cell.
Suppose you want:
- “Month” in the upper-right section.
- “Product” in the lower-left section.
Step 1: Enter the First Heading
Double-click the cell or press F2 to edit it.
Type:
Month
Step 2: Insert a Line Break
Press:
Alt + Enter on Windows.
This creates a new line inside the same cell.
Then type:
Product
Your cell may now contain:
Month
Product
Step 3: Adjust the Position
You can use spaces before one of the words to move it toward the right side of the cell.
For example:
Month
Product
The exact number of spaces depends on the width of your cell.
Step 4: Increase Row Height and Column Width
A diagonal heading generally needs more room than a normal cell.
Drag the row boundary downward to increase the row height and widen the column if necessary.
You may need to experiment until both labels fit comfortably around the diagonal line.
Method 3: Use Text Boxes for Better Positioning
Using spaces inside a cell works for simple tables, but it can become frustrating when you need precise positioning.
A better-looking option is to use text boxes.
Step 1: Create the Diagonal Border
First, add the diagonal border using the method described above.
Step 2: Insert a Text Box
Go to:
Insert > Text Box
Draw a small text box inside one half of the cell.
Enter your first heading.
Step 3: Insert a Second Text Box
Create another text box and position it in the opposite corner.
Enter the second heading.
Step 4: Remove the Text Box Background
For each text box, set:
- Shape Fill: No Fill
- Shape Outline: No Outline
This makes the text appear as though it is part of the cell itself.
Advantages of Using Text Boxes
This method provides much better control over:
- Font size.
- Alignment.
- Positioning.
- Spacing.
- Text rotation.
The downside is that text boxes are separate objects. If you resize or rearrange your worksheet, you may need to reposition them.
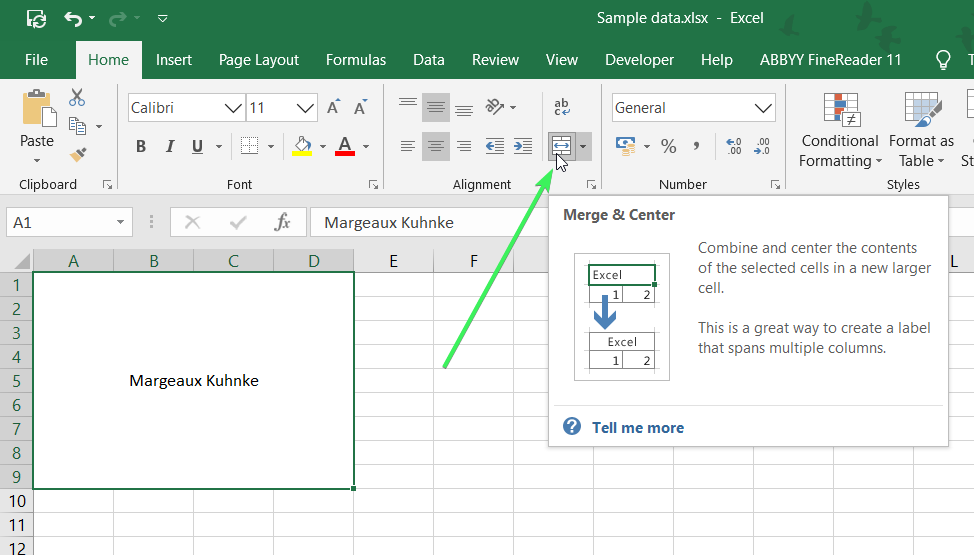
Method 4: Draw a Diagonal Line Manually
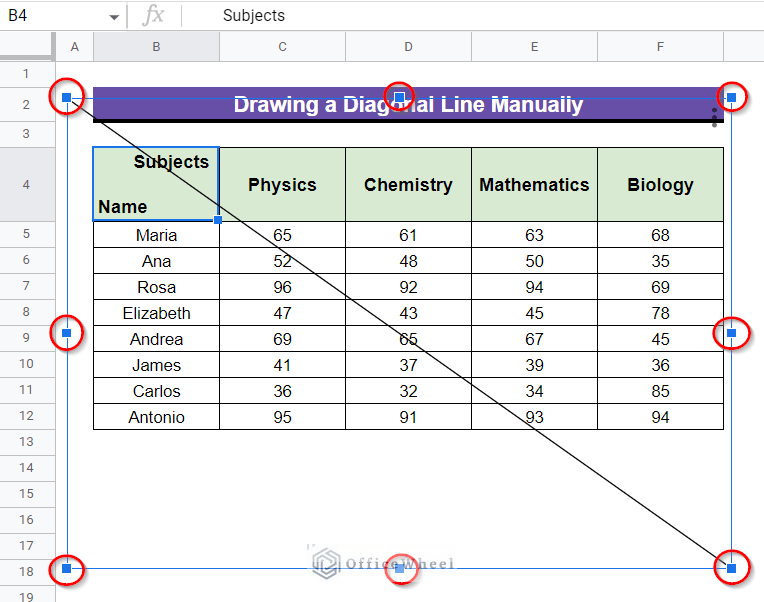
Another option is to use a line shape instead of a cell border.
Go to:
Insert > Shapes > Line
Then draw the line diagonally across the cell.
Holding Shift while drawing can help control the angle.
After drawing the line, you can add two text boxes for the labels.
This technique gives you more freedom over the exact position and appearance of the line.
However, it is generally less convenient than using a diagonal cell border because the line is a floating object rather than part of the cell formatting.
How to Split a Cell Diagonally in Excel Online
Excel for the web has fewer formatting tools than the desktop application, and some versions may not provide all of the diagonal border controls available in desktop Excel.
If the diagonal border option is unavailable, you have several alternatives.
You can:
- Open the workbook in the desktop version of Excel and add the diagonal border there.
- Insert a diagonal line using a shape if supported.
- Create the formatting in desktop Excel and then continue editing the workbook online.
Formatting created in desktop Excel will usually remain visible when the workbook is opened in Excel for the web.
How to Split a Cell Diagonally on Mac
The process in Excel for Mac is similar to Windows.
Select the cell and open the formatting options.
Navigate to:
Format Cells > Border
Choose the appropriate diagonal border.
Then enter your two headings using line breaks and spacing, or use text boxes for more accurate positioning.
The interface may look slightly different depending on your version of Microsoft 365 or Excel.
How to Add Different Colors to Each Half
This is one of the major limitations of diagonal cells in Excel.
Because the cell is still technically one cell, Excel cannot apply two different standard fill colors to the two triangular halves.
If you want one half to be blue and the other half to be yellow, for example, you will need to simulate the effect.
One option is to use triangle shapes.
Go to:
Insert > Shapes
Add triangular shapes over each half of the cell.
You can then:
- Give each triangle a different color.
- Remove the shape outlines.
- Place text over the shapes.
This approach can produce attractive results, but it requires more manual formatting.
For large spreadsheets, it usually is not practical.
How to Create a Diagonal Header in a Table
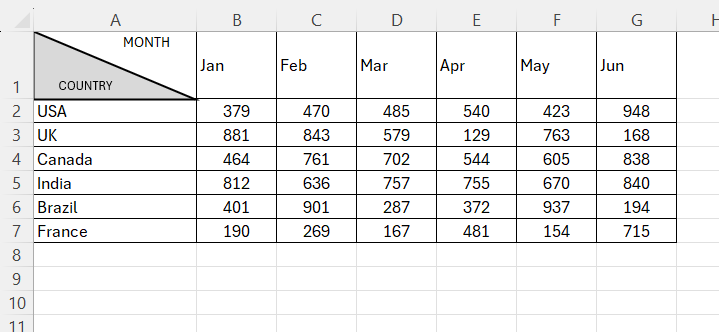
Diagonal cells are most commonly used in the top-left corner of a table.
Imagine a table where:
- Rows represent employees.
- Columns represent months.
Instead of using two separate cells, the upper-left cell could display:
Month in the upper-right corner.
Employee in the lower-left corner.
A diagonal line visually separates the two headings.
A simple workflow is:
- Select the upper-left cell.
- Increase its row height and column width.
- Apply a diagonal border.
- Type the column heading.
- Insert a line break.
- Type the row heading.
- Add spaces or use text boxes to position the headings.
- Adjust alignment until the design looks balanced.
Changing the Diagonal Line Style
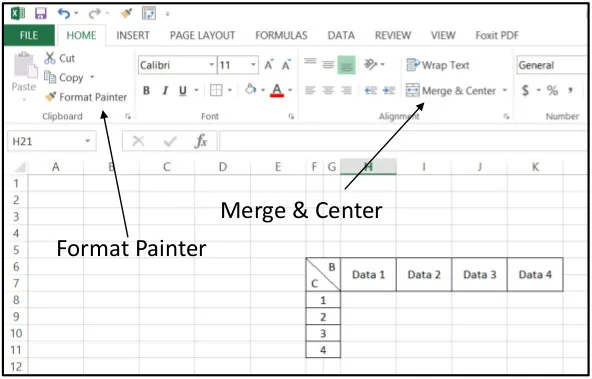
You are not limited to the default thin black line.
Open:
Format Cells > Border
Before selecting the diagonal border, choose a different line style.
Depending on your Excel version, you may be able to use:
- Thin lines.
- Thick lines.
- Dashed lines.
- Dotted lines.
- Double lines.
- Different border colors.
For business spreadsheets, a simple thin or medium solid line usually looks best.
Removing a Diagonal Border
If you decide that you no longer want the diagonal split:
- Select the cell.
- Open Format Cells.
- Go to Border.
- Click the active diagonal border to disable it.
- Click OK.
The diagonal line will disappear while the cell contents remain intact.
Can You Enter Separate Data Into Each Half?
No.
This is the most important thing to understand about diagonal cells in Excel.
Both triangular sections are only visual sections. Excel still sees the entire area as one cell.
For example, if the diagonal cell is A1, you cannot enter:
- One value into the upper section of A1.
- Another independent value into the lower section of A1.
You can place multiple pieces of text inside A1, but formulas and references will continue to treat it as a single cell.
If you need two independently usable values, use two actual cells instead.
Alternative: Use Two Cells Instead
Before creating a diagonal header, consider whether two separate cells would be easier.
For example, instead of forcing “Month” and “Product” into one cell, you could create separate row and column header cells.
This approach is usually better for:
- Sorting.
- Filtering.
- Data analysis.
- Accessibility.
- Screen readers.
- Automated reports.
- Power Query.
- PivotTables.
Diagonal cells are primarily a visual formatting technique.
Common Problems and Solutions
Text Overlaps the Diagonal Line
Increase the row height and column width.
You can also reduce the font size or use text boxes for more accurate placement.
Spaces Do Not Position the Text Correctly
Using spaces is not always reliable because fonts and column widths can change.
Text boxes provide much better control.
The Diagonal Line Disappears After Copying
Make sure you copy the cell’s formatting and not just its value.
Using the standard Copy and Paste command should preserve the border.
The Line Does Not Print Correctly
Check the worksheet in:
File > Print
Some very thin borders may appear differently when printed.
Using a slightly thicker line may improve printed results.
I Cannot Find the Diagonal Border Option
The option may be unavailable in some simplified or web-based versions of Excel.
Try opening the workbook in the desktop version of Microsoft Excel.
Best Practices for Diagonal Cells
Diagonal headings can make spreadsheets look polished, but they should be used sparingly.
For the best results:
- Use diagonal cells mainly for headers.
- Keep text short.
- Increase the cell dimensions.
- Avoid complicated formulas in the diagonal cell.
- Use a readable font size.
- Keep the diagonal line simple.
- Test how the spreadsheet looks when printed.
- Use text boxes when presentation quality is important.
Avoid using dozens of diagonally divided cells in data-heavy spreadsheets because they can make the worksheet harder to read and maintain.
Advantages and Disadvantages
Diagonal Cell Formatting Review
Diagonal cell formatting is a useful but specialized feature in Excel.
For simple table headers, the built-in diagonal border works extremely well. It takes only a few seconds to apply and can make a table more compact and visually organized.
The biggest weakness is that the feature is purely cosmetic. Excel does not create two real cells, which means you cannot independently reference, calculate, format, or sort the two sections.
The built-in border method is therefore best suited to presentation rather than data structure.
For most users, the best combination is:
Diagonal border + multiline text for simple spreadsheets.
For reports where appearance is especially important:
Diagonal border + text boxes provides the cleanest result.
Ease of Use: 9/10
Adding the diagonal border itself is extremely easy.
Flexibility: 7/10
There are several formatting options, but text positioning can require some experimentation.
Data Functionality: 3/10
Because the cell remains a single cell, the two sections cannot behave independently.
Visual Quality: 8/10
With careful alignment, diagonal headers can look clean and professional.
Overall Rating: 8/10
Diagonal cell formatting is an excellent visual tool for table headers, but it should not be confused with actually splitting a cell into two functional cells.
Frequently Asked Questions
Can Excel split one cell into two diagonal cells?
No. Excel can create a diagonal border that makes the cell appear divided, but it remains one cell.
How do I type on both sides of a diagonal line?
Enter two lines of text using Alt + Enter, then use spacing and alignment to position them. Alternatively, use two text boxes.
Can each half have a different color?
Not with normal cell formatting. You would need to use shapes or other design techniques to simulate separate colors.
Can I use formulas in both halves?
No. Since the cell remains one cell, it can contain only one underlying formula or value.
Can I split a cell diagonally in Excel Online?
Support depends on the version and available formatting controls. If the diagonal border option is missing, create it in desktop Excel and then reopen the workbook online.
Is a diagonal cell suitable for large datasets?
Usually not. It is best used as a decorative header rather than as part of the actual data structure.
Final Verdict
Splitting a cell diagonally in Excel is straightforward once you understand that it is a formatting trick rather than a true cell split.
The simplest method is to open Format Cells > Border, apply a diagonal border, and then add two headings using a line break. For better-looking reports, text boxes provide more precise control.
Diagonal cells work particularly well for compact tables, schedules, and cross-reference charts. However, if the two sections need to hold independent data or formulas, using two real cells is the better solution.
For occasional table headers, the feature is fast, effective, and worth using. Just keep the design simple and remember that the diagonal line changes only the appearance of the cell—not how Excel stores or processes the data.
READ ALSO: Best Pastebin alternatives: full comparison

Hi, this is Masab, the Founder of PC Building Lab. I’m a PC enthusiast who loves to share the prior knowledge and experience that I have with computers. Well, troubleshooting computers is in my DNA, what else I could say….